> ## Documentation Index
> Fetch the complete documentation index at: https://mooncamp.com/docs/llms.txt
> Use this file to discover all available pages before exploring further.
# Create KPIs in Mooncamp
> A guide on how to create KPIs (Key Performance Indicators) in Mooncamp
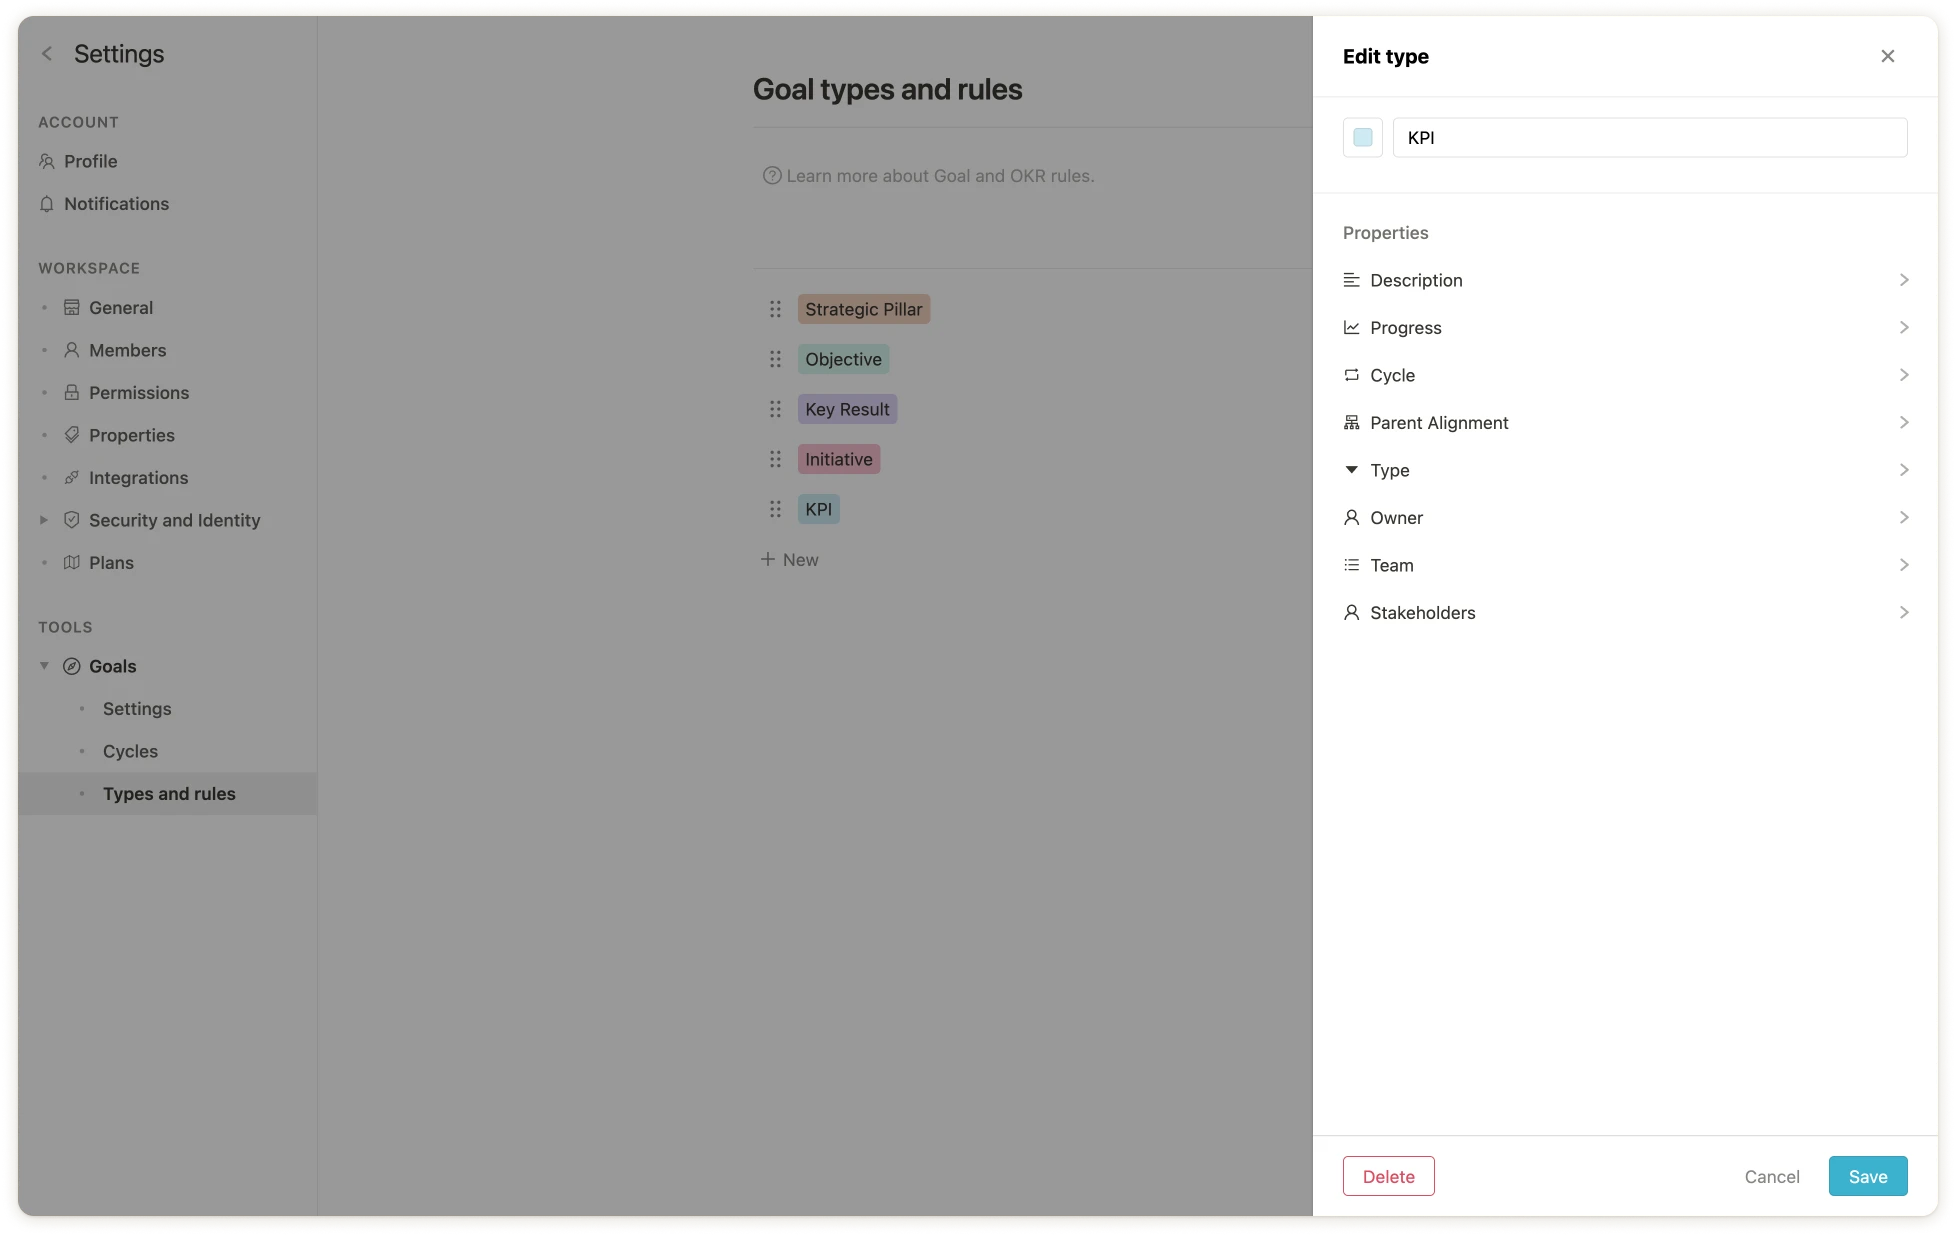
As an admin, under `Settings` > `Goals` > `Types and rules` you can find all created goal types in your Goal management system, such as `Objective`, `Key Result` or `Initiative`.
### Step 1: Add KPI as a goal type (admin function)
To create a KPI (Key Performance Indicator) in Mooncamp, navigate to the goal types in the settings and click on `New`, name the type (e.g. `KPI`) and click on `Save`.
 ### Step 2: Create a new view for your KPIs
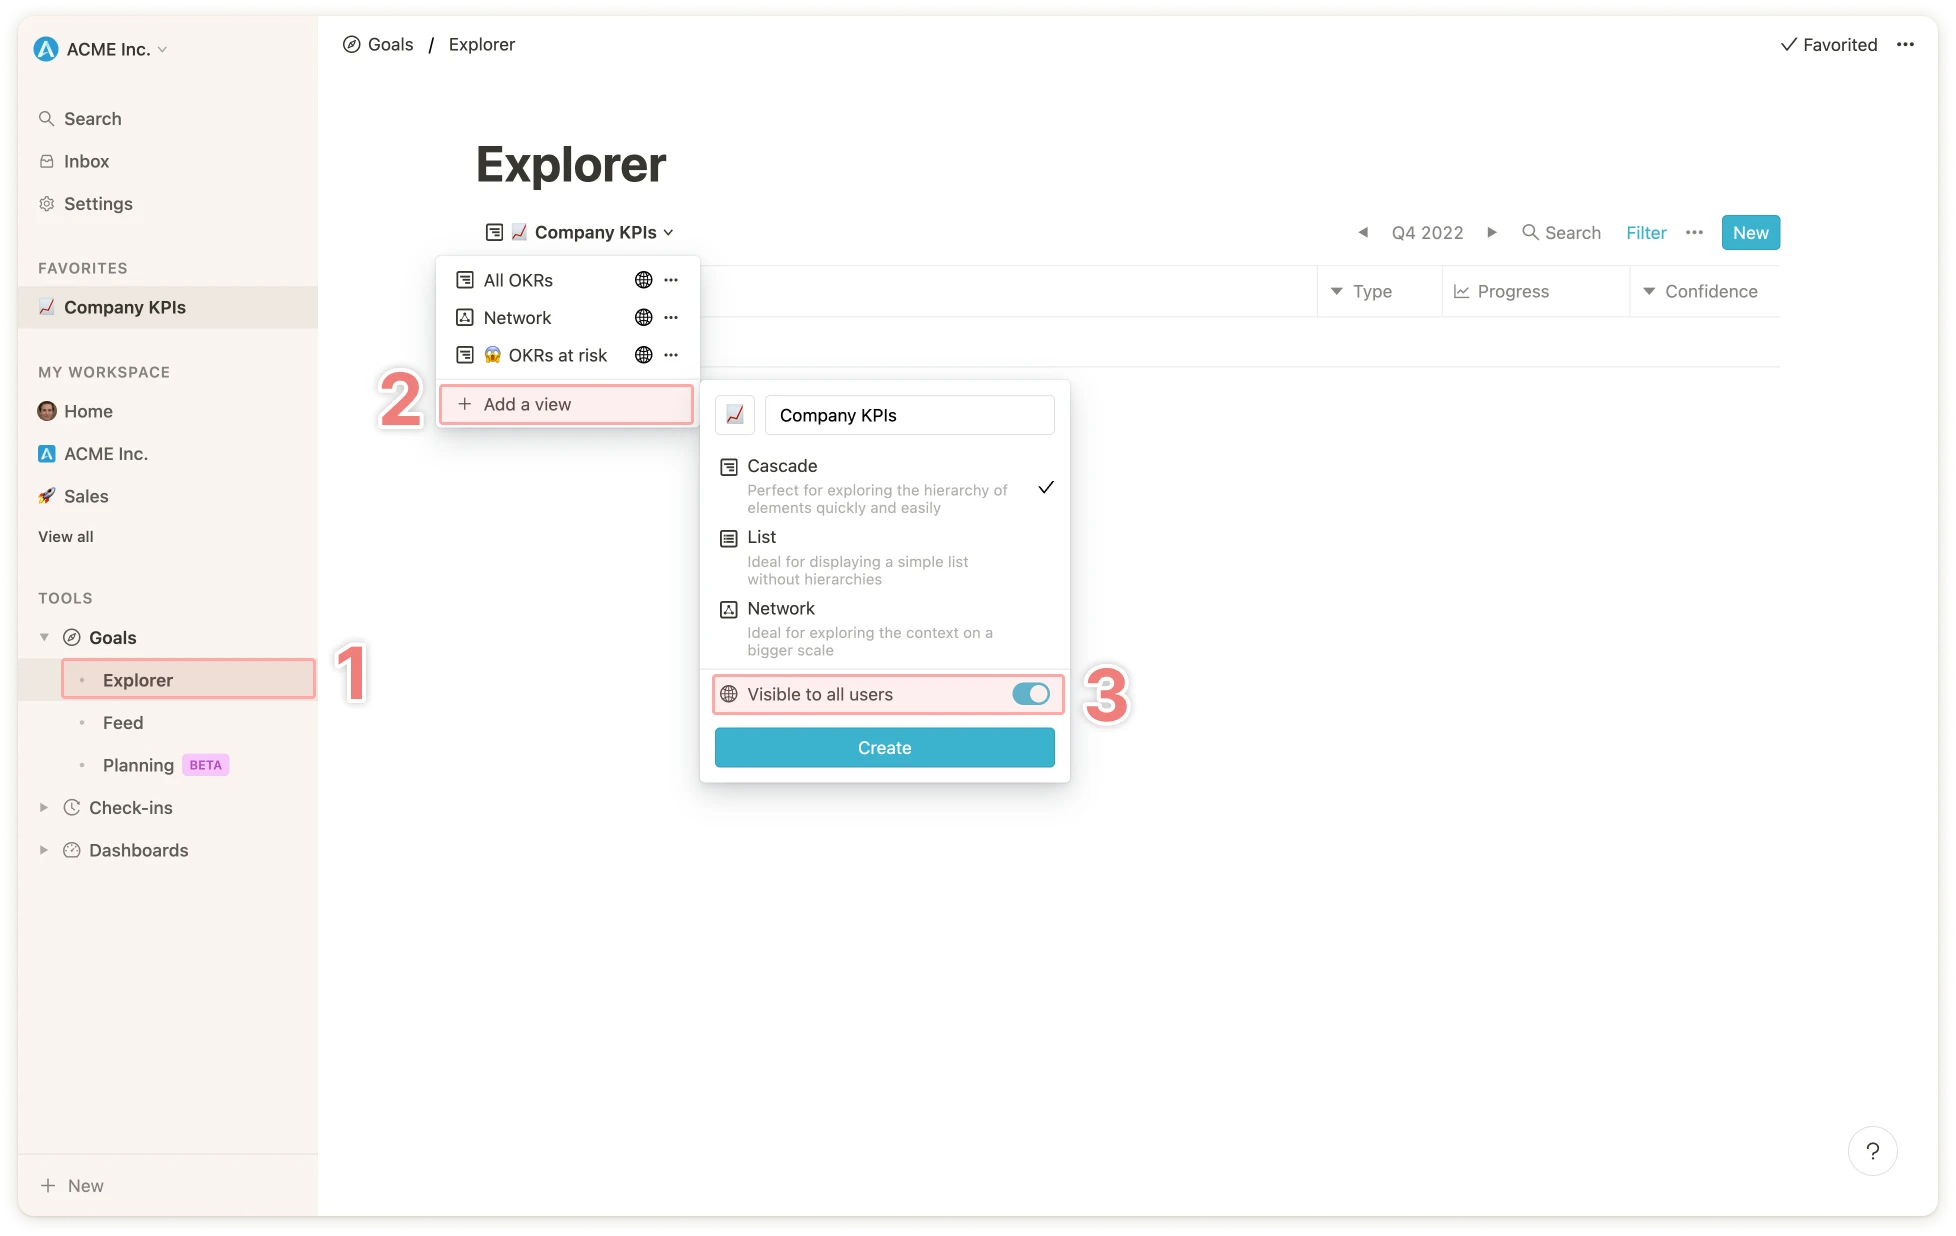
Navigate to the Goal Explorer `1` and create a new view for your KPIs. To do this, click `Add a view` `2`, name the view and choose whether you want it to be visible only to you or to everyone in the account `3`.
### Step 2: Create a new view for your KPIs
Navigate to the Goal Explorer `1` and create a new view for your KPIs. To do this, click `Add a view` `2`, name the view and choose whether you want it to be visible only to you or to everyone in the account `3`.
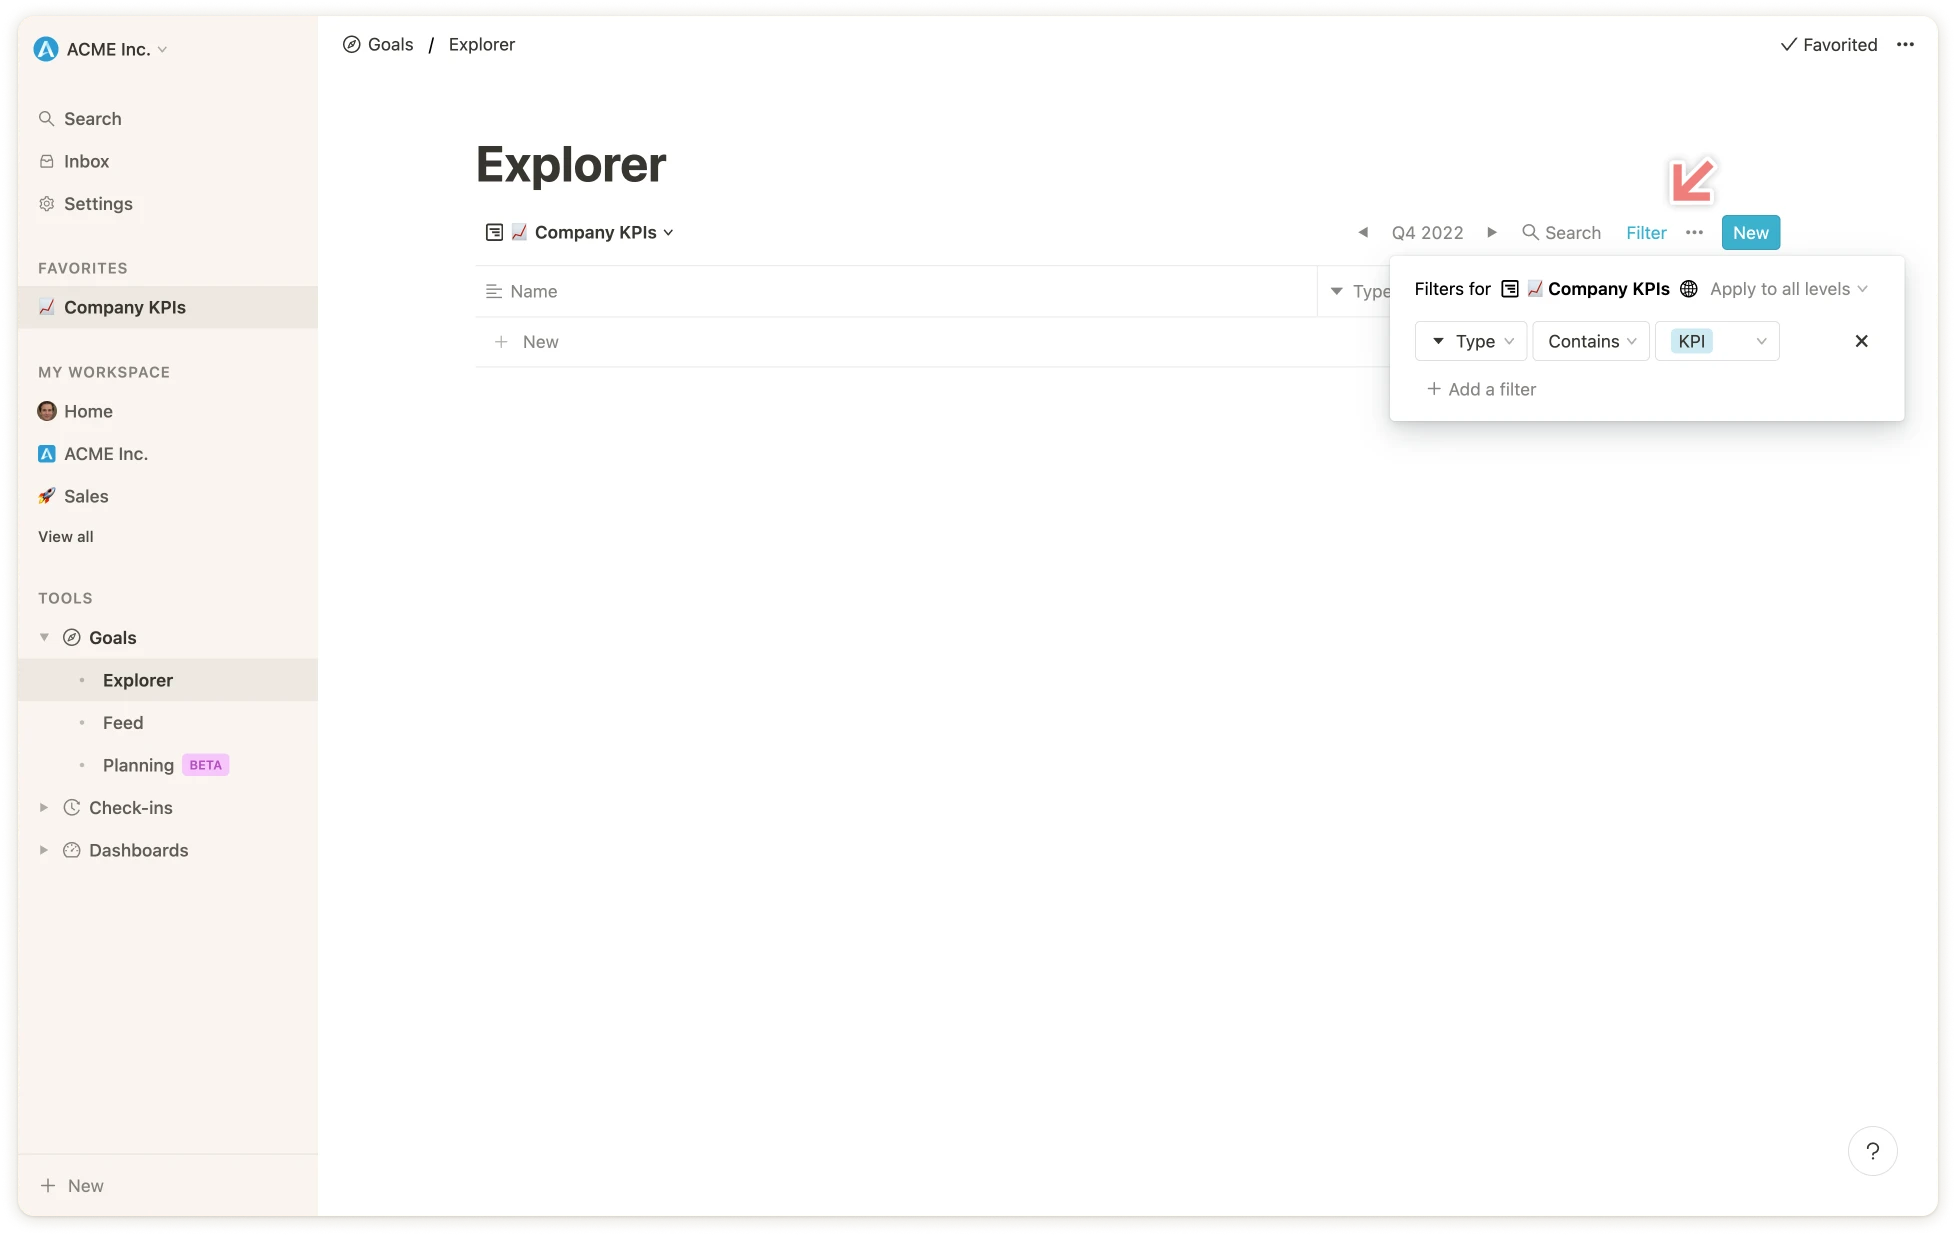
 Then filter the goal type by `KPI`.
 ### Step 3: Create the KPIs
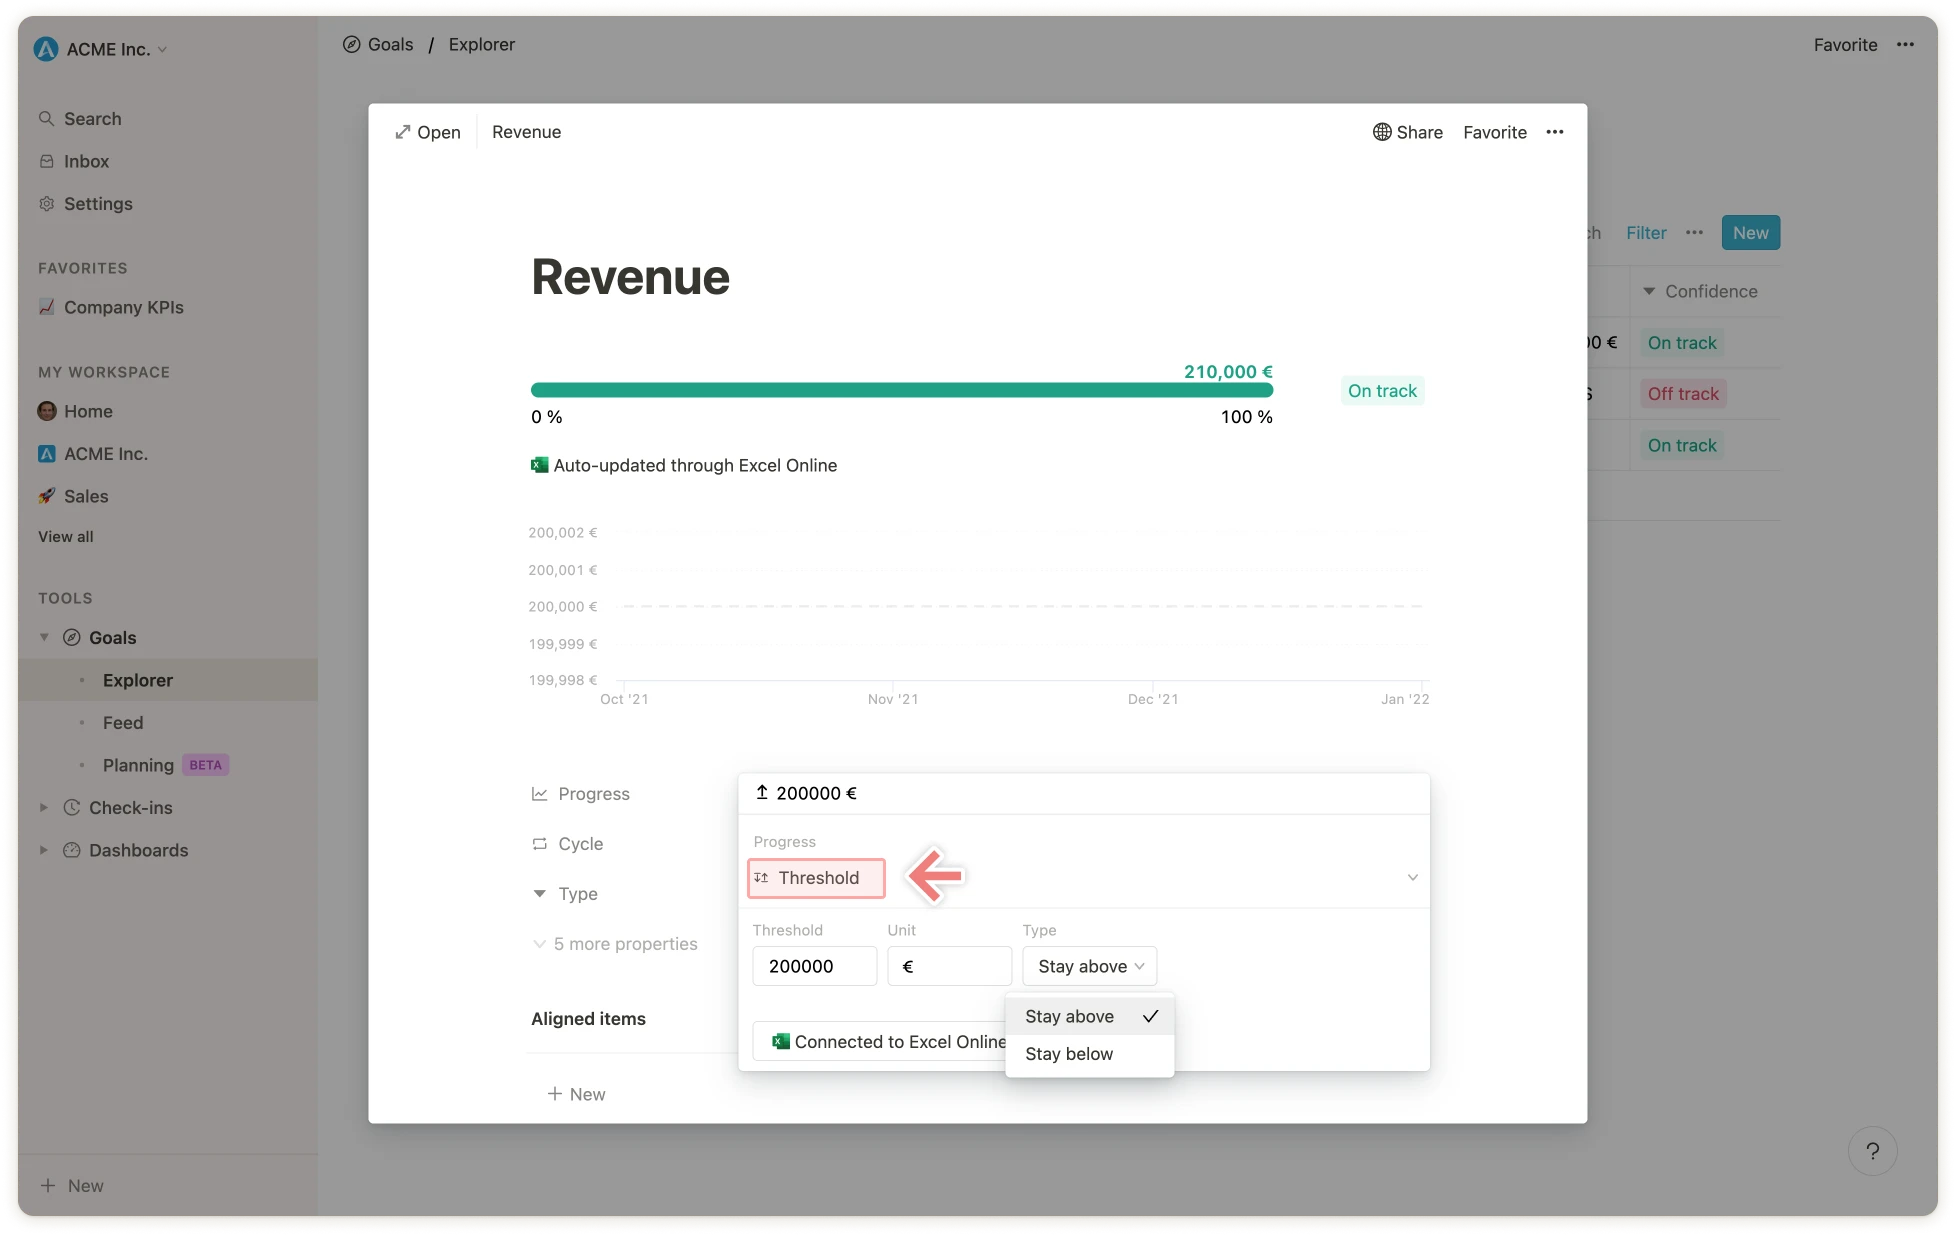
Click on `New` to create a new KPI. For KPIs, it is useful to select the `Threshold` option under `Progress`. Here you can specify whether the associated KPI should be above or below a certain value. The status of the KPI changes accordingly.
### Step 3: Create the KPIs
Click on `New` to create a new KPI. For KPIs, it is useful to select the `Threshold` option under `Progress`. Here you can specify whether the associated KPI should be above or below a certain value. The status of the KPI changes accordingly.
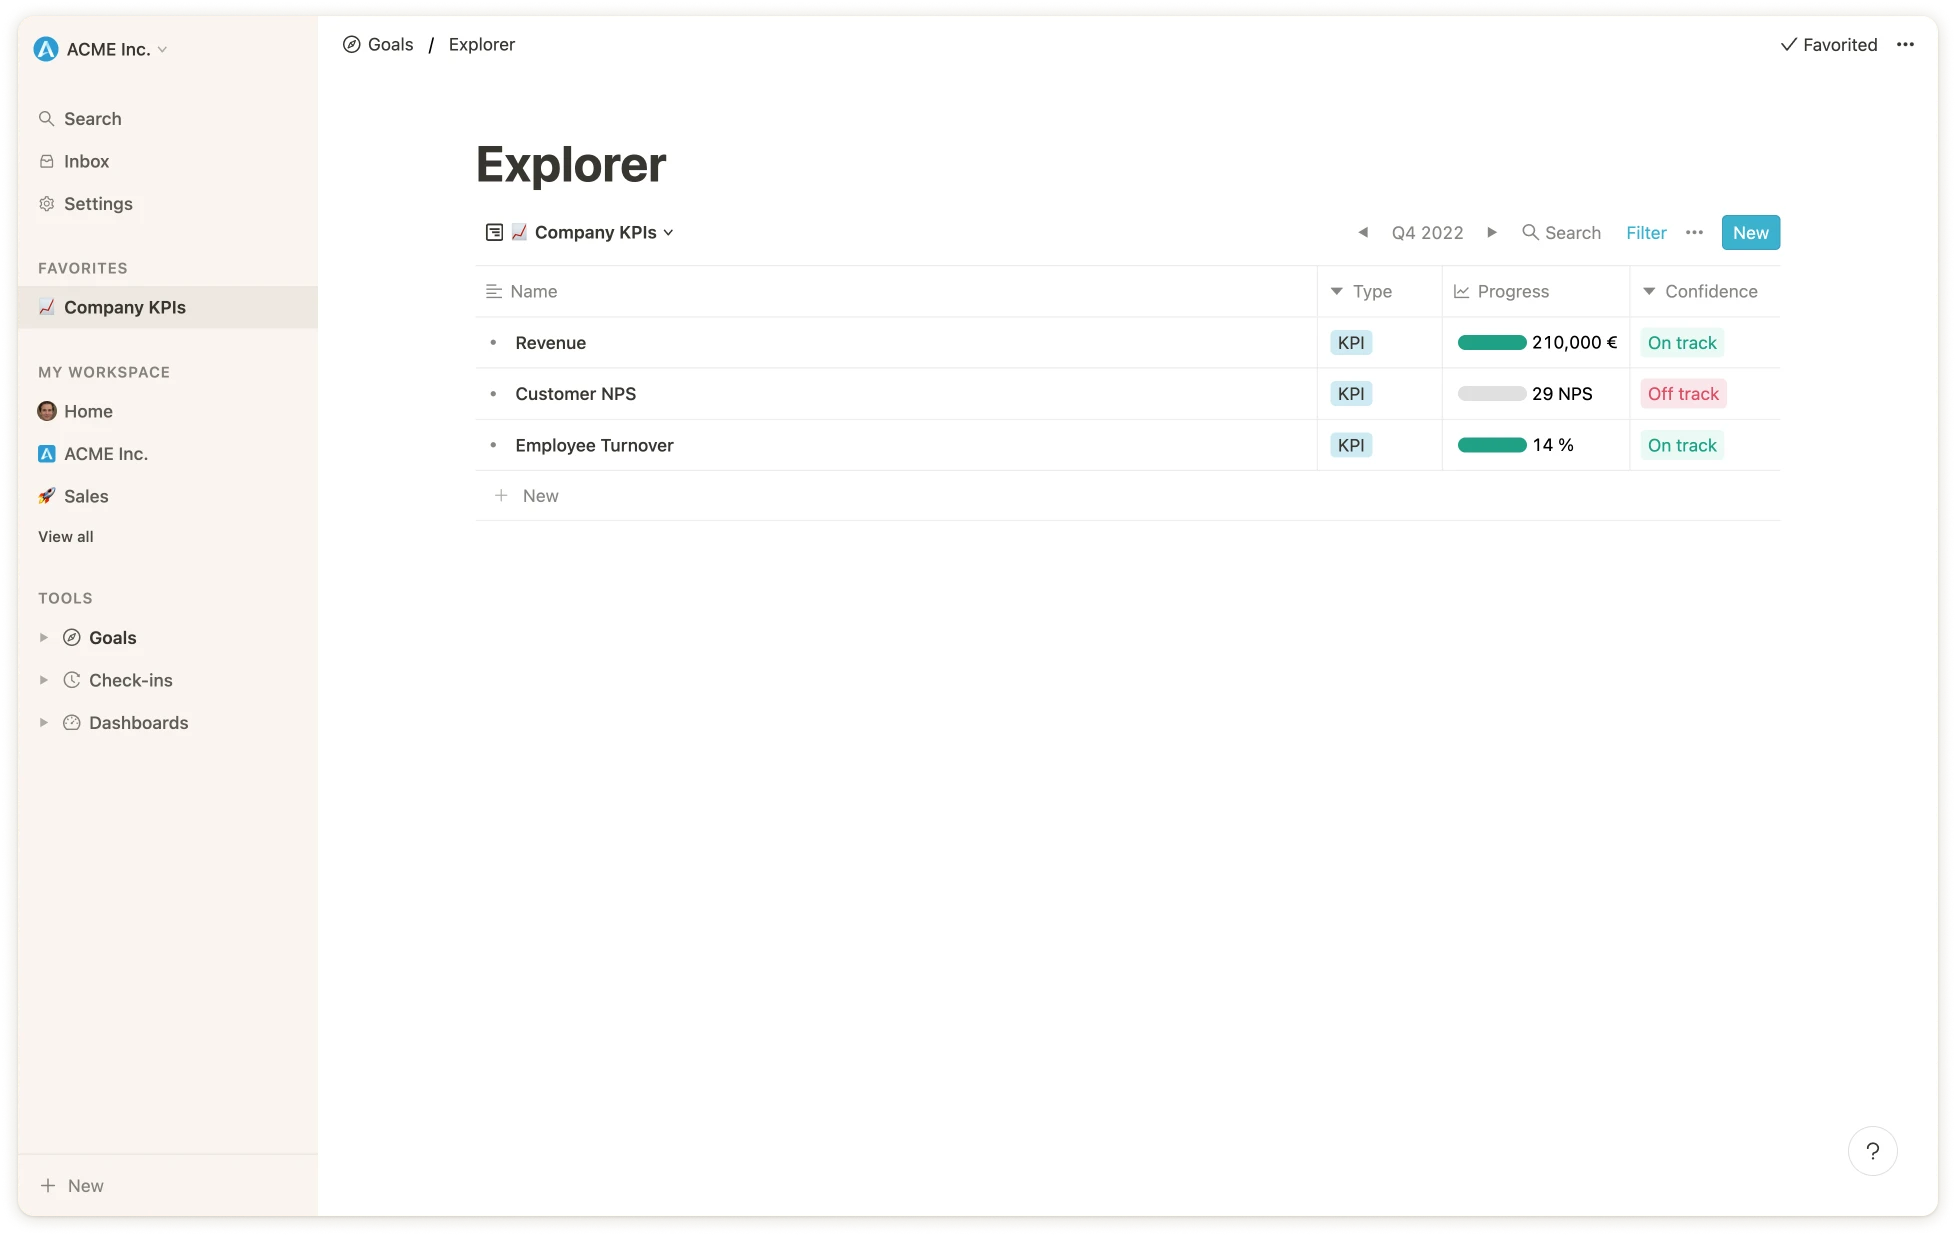 **Note:** If only the metric of the KPI and not the status should be displayed, the column for the status can be hidden in the view.
### Step 4: Update your KPIs
Afterwards, the KPIs can be updated either manually or via integration.
**Manual update**
Just like with other goal types, the KPIs can be updated via the cascade view or on the goal's detail page. You can learn more about how to update goals in this help center article:
[How to Update a Goal](/updating-goals)
**Automatic update via integration**
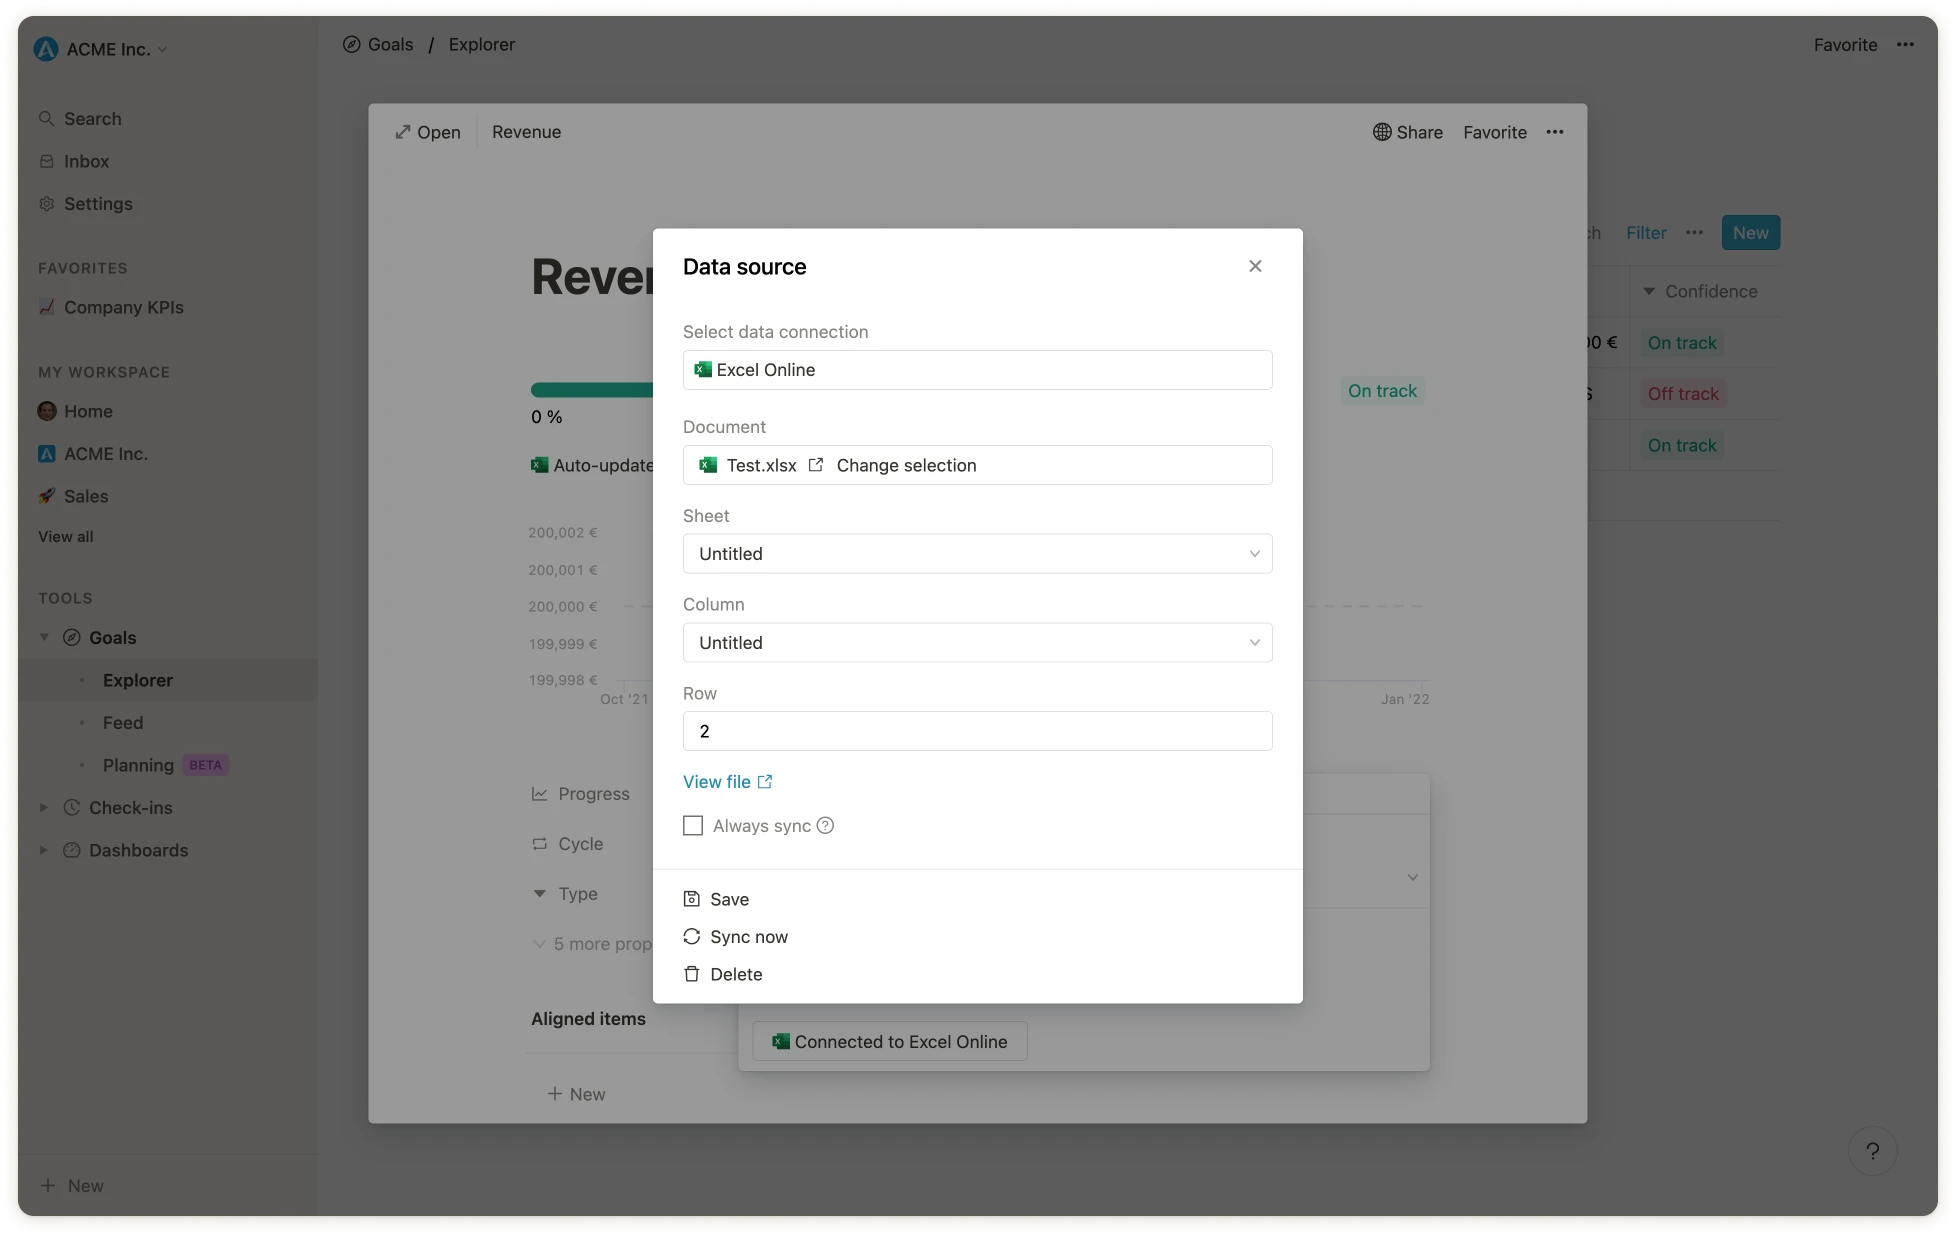
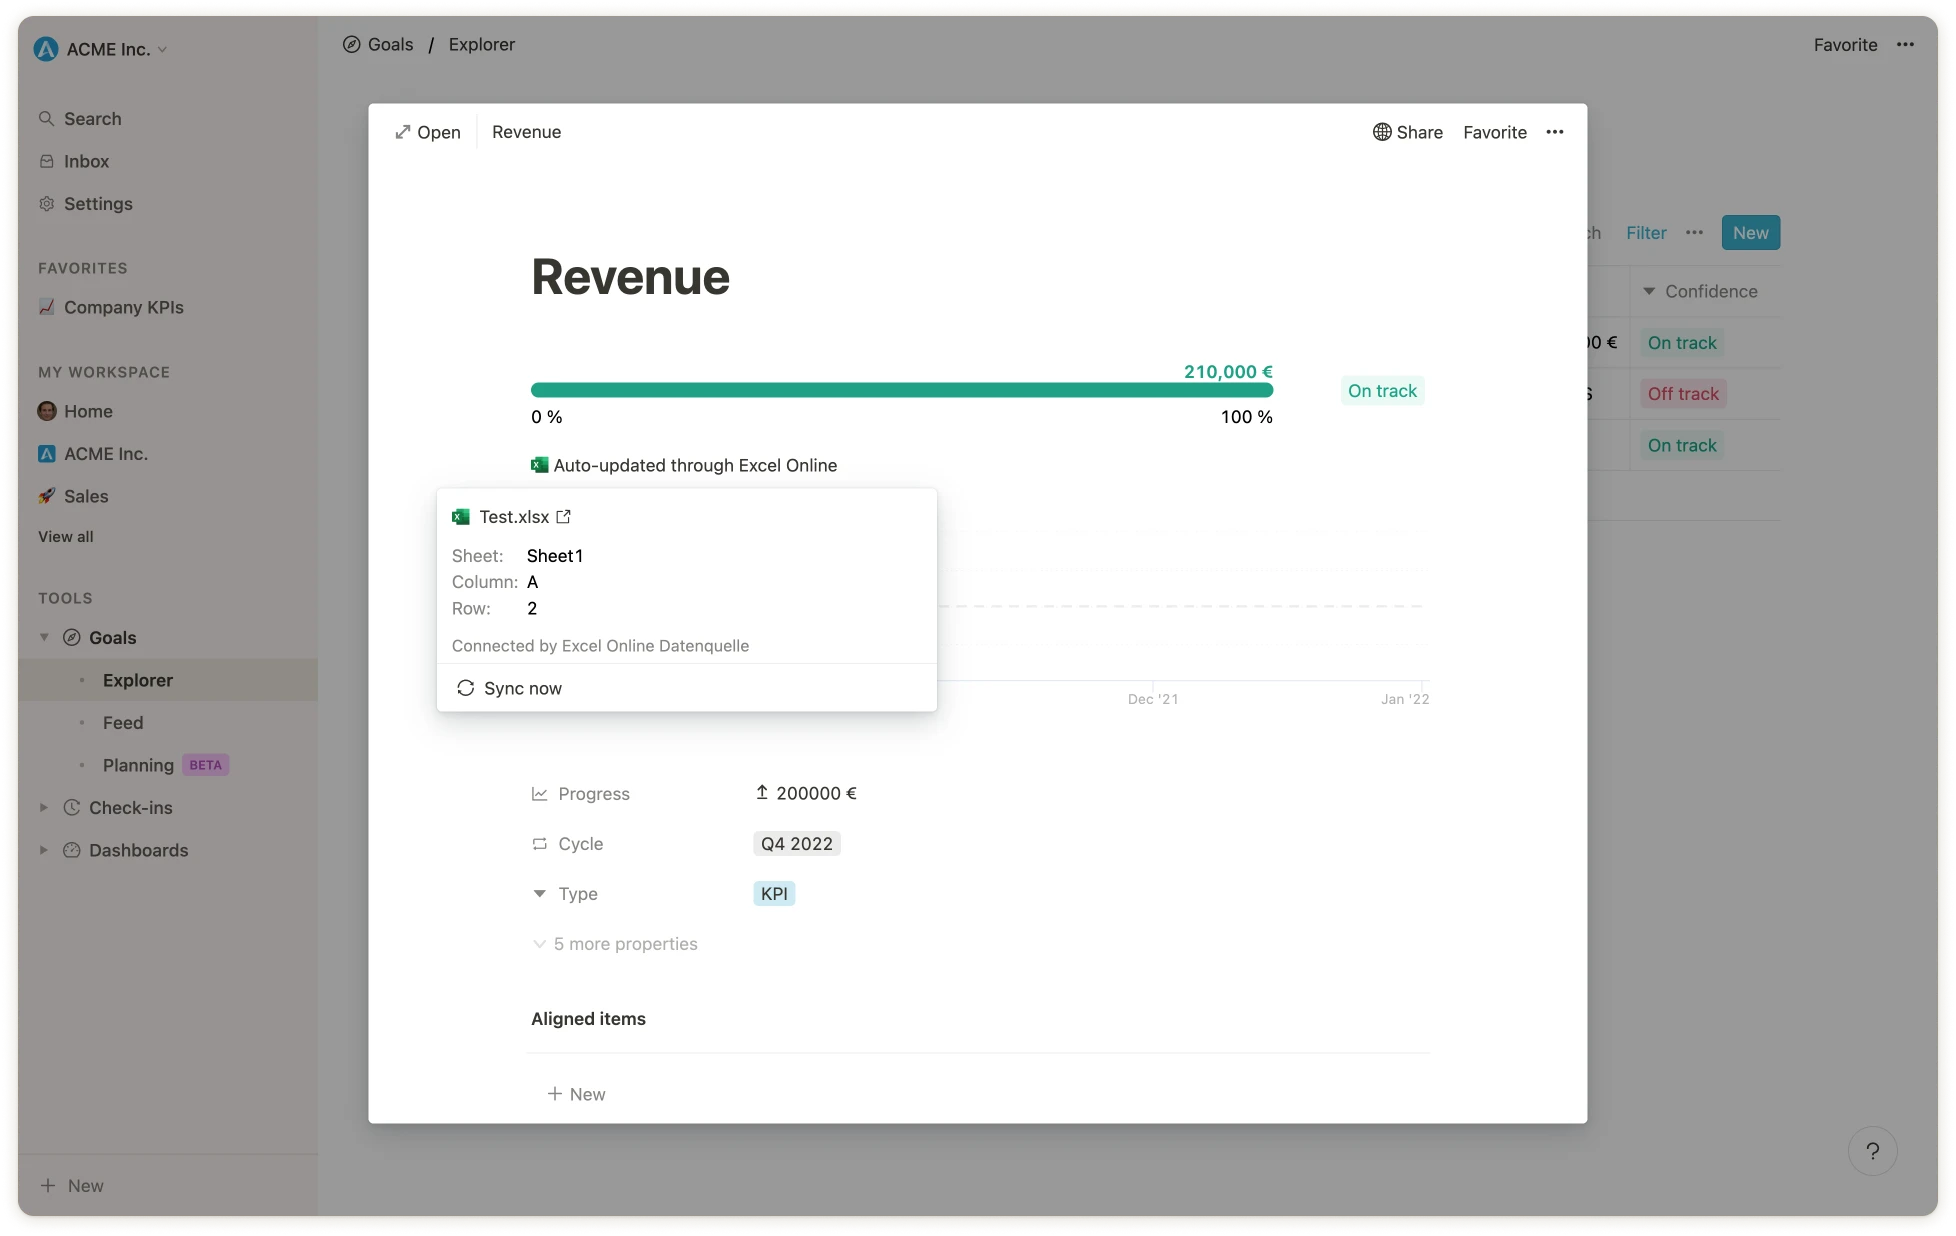
KPIs can also be updated automatically by linking them to other tools like Excel, Jira or Google Sheets. You can learn more about how to connect data integrations in this help center article:
[Connect data integrations to Goals and OKRs](/data-integrations)
**Note:** If only the metric of the KPI and not the status should be displayed, the column for the status can be hidden in the view.
### Step 4: Update your KPIs
Afterwards, the KPIs can be updated either manually or via integration.
**Manual update**
Just like with other goal types, the KPIs can be updated via the cascade view or on the goal's detail page. You can learn more about how to update goals in this help center article:
[How to Update a Goal](/updating-goals)
**Automatic update via integration**
KPIs can also be updated automatically by linking them to other tools like Excel, Jira or Google Sheets. You can learn more about how to connect data integrations in this help center article:
[Connect data integrations to Goals and OKRs](/data-integrations)
 ### (Optional) **Step 5: Add the view to your favorites**
To have the most important KPIs quickly accessible, they can be added as favorites to the sidebar.
### (Optional) **Step 5: Add the view to your favorites**
To have the most important KPIs quickly accessible, they can be added as favorites to the sidebar.
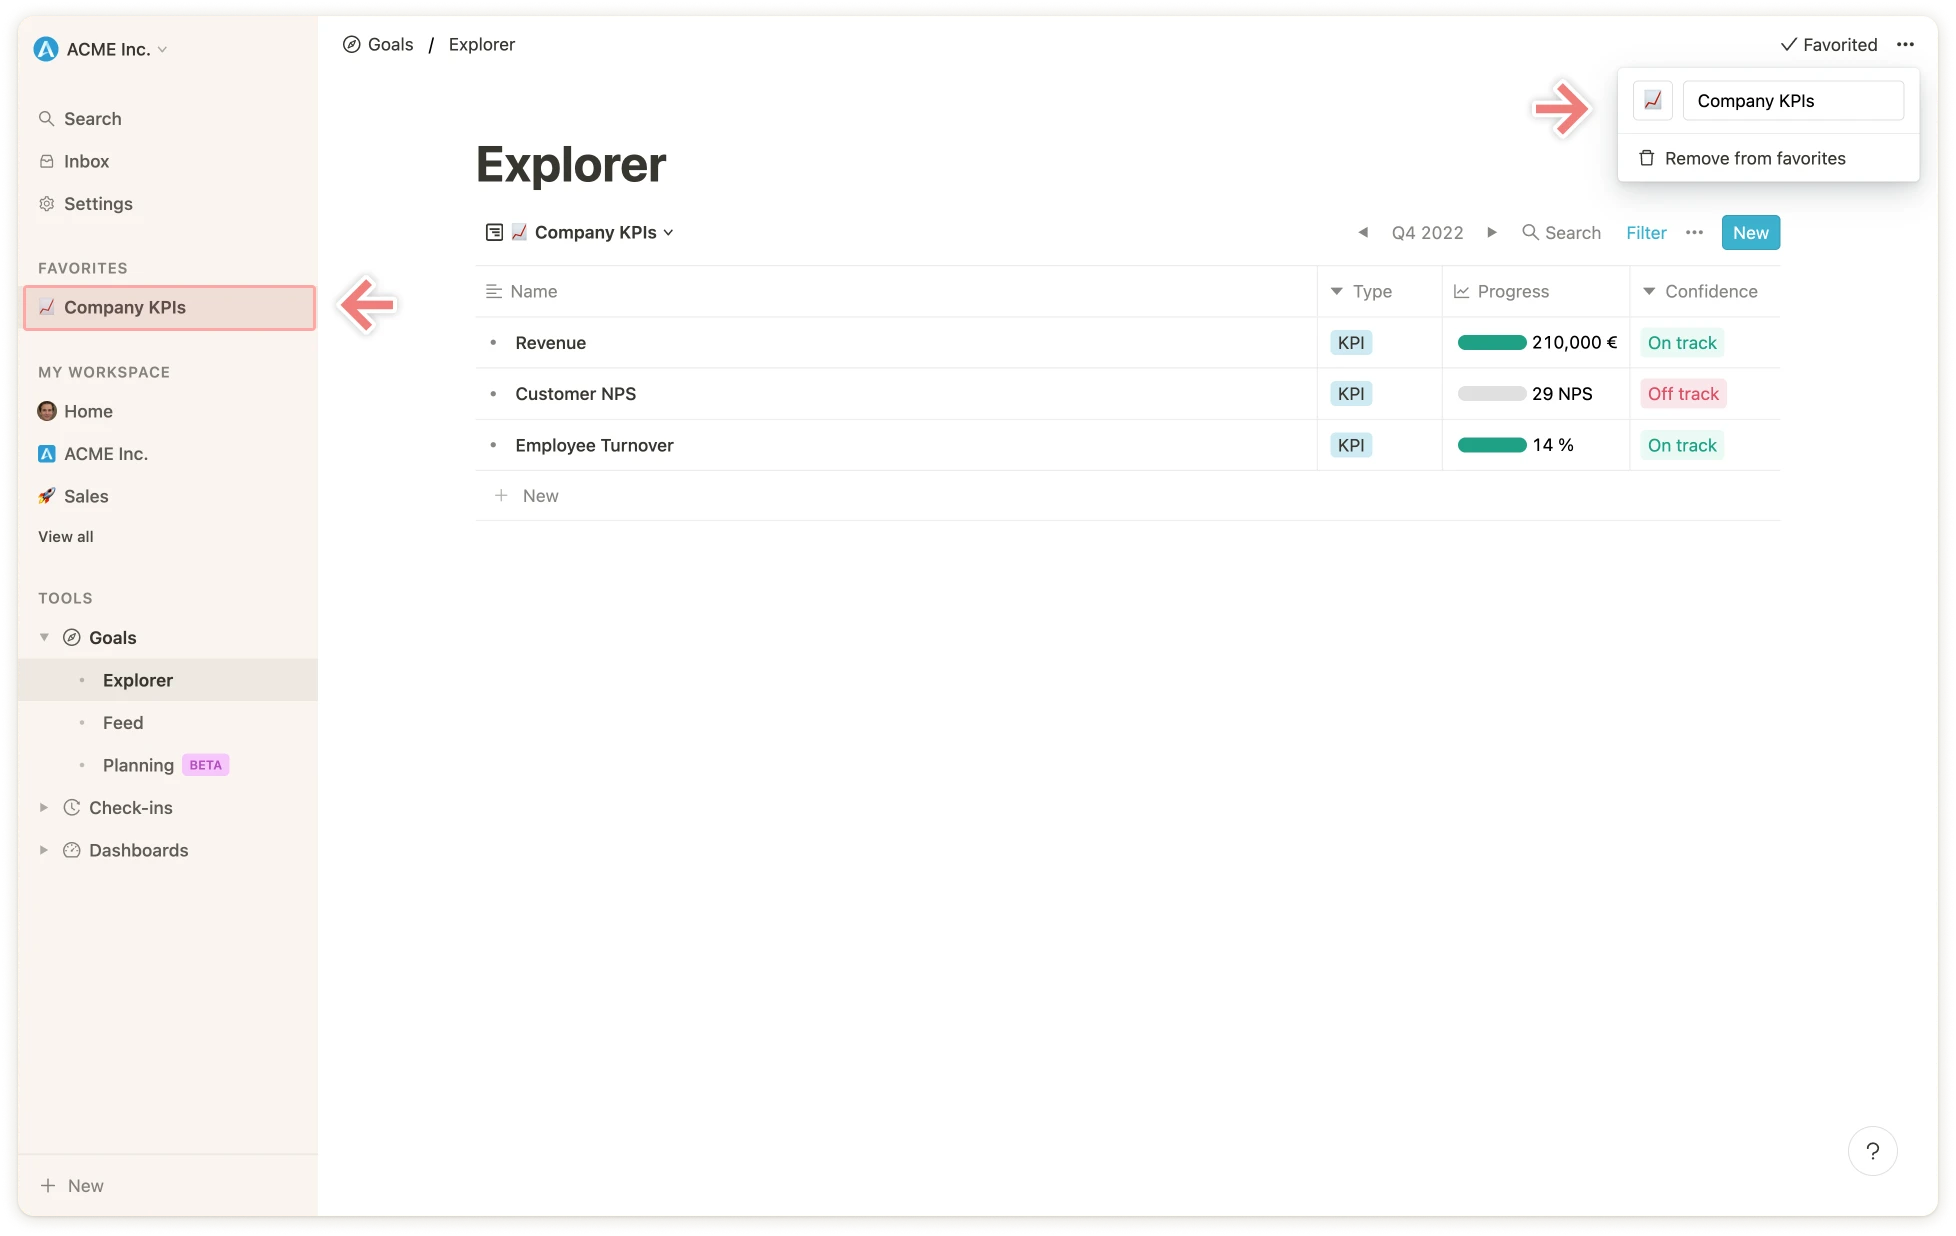 Of course, the same approach can also be used to create different views for specific users or teams. As an example, for `Marketing KPIs` you would set a filter for the Marketing team accordingly.
### (Optional) **Step 6: Export your KPIs**
To export the data of a view, navigate to the respective view and click on the ellipsis in the upper right corner `...` and select `Export CSV`.
Of course, the same approach can also be used to create different views for specific users or teams. As an example, for `Marketing KPIs` you would set a filter for the Marketing team accordingly.
### (Optional) **Step 6: Export your KPIs**
To export the data of a view, navigate to the respective view and click on the ellipsis in the upper right corner `...` and select `Export CSV`.
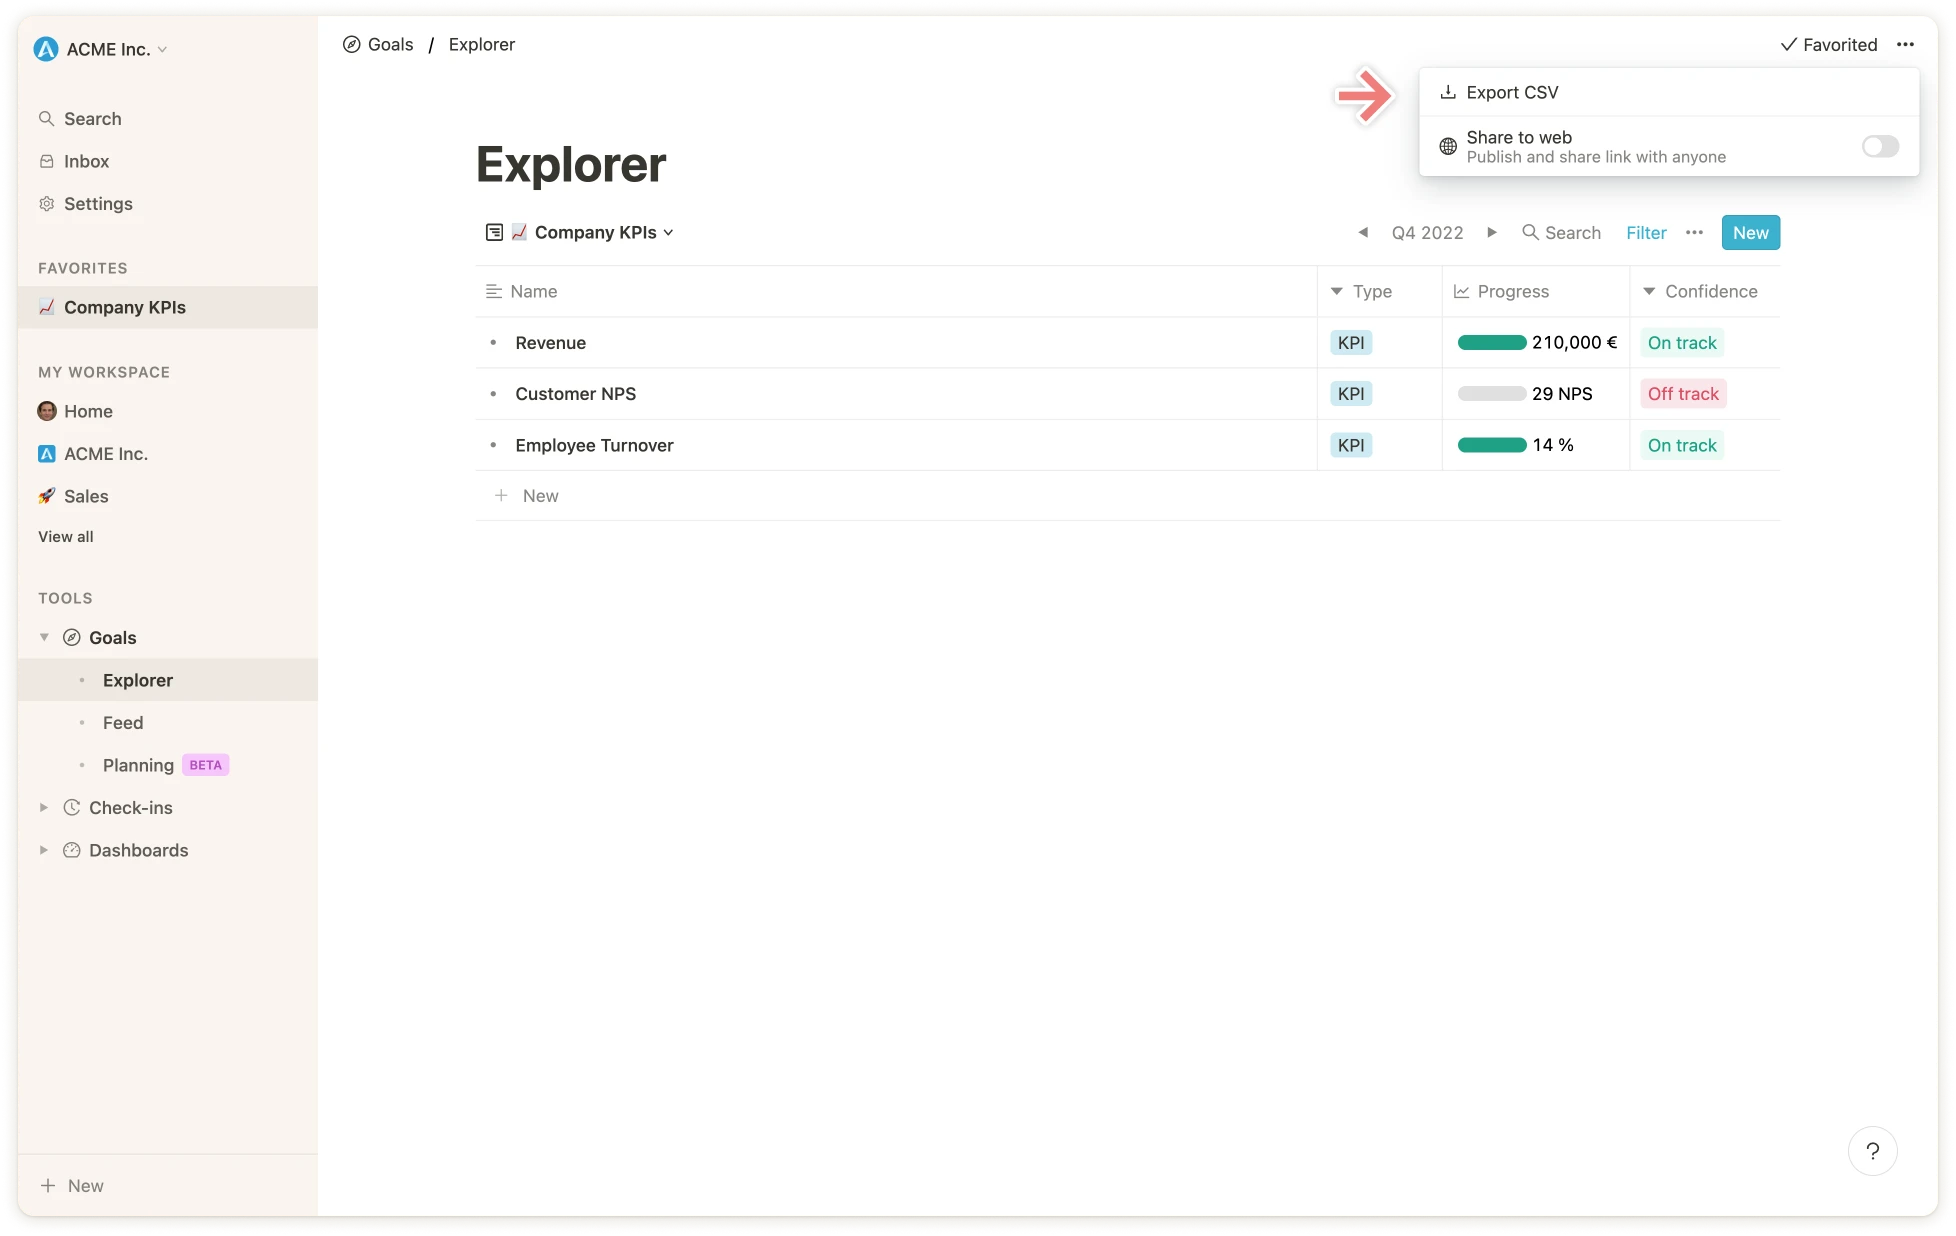 The CSV file will be downloaded afterwards.