Overview
The Microsoft Planner integration updates your goal progress automatically based on task completion in Planner.The Planner integration is available for customers on the Pro and Enterprise plans.
How to set up the integration
Account admins can enable the Planner integration by following these steps:- Access Integrations: Go to your Mooncamp workspace settings and open the Integrations section.
- Enable Microsoft Planner: Find Microsoft Planner and toggle the integration on.
- Connect to Microsoft Planner: Any user can then sign in with their Microsoft account and grant access to Planner. Once authorized, users can link their Mooncamp goals with their Plans in Microsoft Planner.
Using Microsoft Planner for tracking goals
To automatically track progress for a goal using Microsoft Planner, follow these steps:- Create or edit a goal: Go to the Progress property and choose a measurement type that allows connecting to a data source.
- Select Automatic Progress Tracking: Click Connect to data source and select Planner from the list of available integrations.
- Tracking Progress: Based on the progress type (numeric or percentage-based), choose how to track progress:
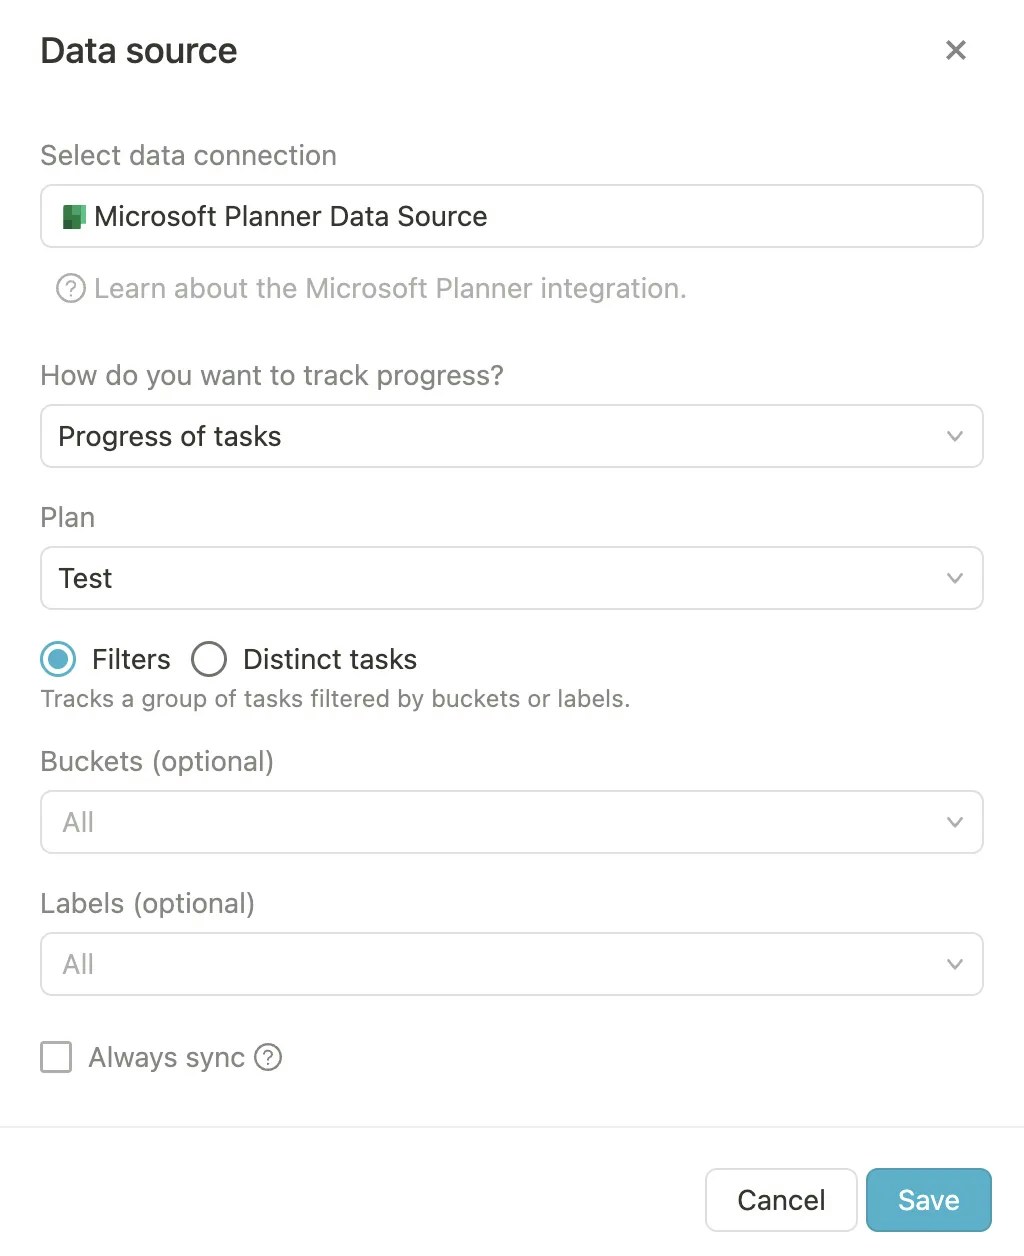
Filter (filtering a set of tasks of a Plan by buckets and labels) and Distinct tasks (selecting a set of tasks from a Plan by hand).
Filter
Filter
-
Progress of tasks:
This is one of the most popular options. It allows you to link a plan’s progress to one of your goals in Mooncamp. When selected, you’ll see the percentage of completed tasks among those you’ve chosen. Progress updates occur when tasks are marked as
In ProgressorCompleted. In-progress tasks are considered 50% complete, while fully completed tasks are 100% complete.Example: If your plan has 10 tasks, with 3 Completed and 2 In Progress, the overall progress would be 40%. -
Progress of checklist items:
This shows the percentage of completed checklist items.
Example: If there are 10 checklist items and 3 are completed, the overall progress would be 30%.
- Count of completed tasks: This option returns the number of completed tasks. It’s useful when you know in advance how many tasks you need to complete, such as milestones. You can set up your goal to target the total number of tasks.
- Count of completed checklist items: This option returns the number of completed checklist items.
Distinct tasks
Distinct tasks
- Progress of tasks: This will measure the progress of one or more selected tasks.
- Progress of checklist items: This shows the percentage of completed checklist items of the selected tasks.
- Count of completed tasks: This option returns the number of completed tasks among the selected tasks.
- Count of completed checklist items: This option returns the number of completed checklist items among the selected tasks.
- Choose the Plan: Select the Plan you want to link to your goal.
- Select tasks (optional, per default all tasks are selected) Filter tasks by buckets or select specific tasks, see explanation above.
- Save your connection: After configuring your tracking settings, click Save. The Planner icon will appear next to your goal, indicating it’s synced with Microsoft Planner.
Automatic Progress Updates
Once the integration is active, Mooncamp automatically updates your goals based on changes in MS Planner.Tip for admins: Go to
Settings > Integrations, and make sure every day is selected under Synchronization.